|
|
Version: 0.2.0 |
Loading...
Searching...
No Matches
Ardupilot Example
Table of Contents
1. Setup Ardupilot
- NOTE: For Ardupilot, recommend to use Mission planner with Windows
- The QGroundControl also can be used but not recommended
1.1. Install Mission Planner
- Install Ardupilot Mission Planner from the link
1.2. Install the Ardupilot Firmware
- Install Ardupilot OS with matching version of your flight controller
- Open QGroundControl, click the Q Logo, Vehicle Settings
- Click Firmware and upload the downloaded firmware
Setup the flight controller parameters
AHRS_EKF_TYPEparameter to2orEnable EKF2EK2_ENABLEparameter to1orEnableEK3_ENABLEparameter to0orDisableGPS_TYPEparameter to0orNoneEK2_GPS_TYPEparameter to3orNo gpsEK2_POSNE_M_NSEparameter to 0.1EK2_VELD_M_NSEparameter to 0.1EK2_VelNE_M_NSEparameter to 0.1COMPASS_ENABLE,COMPASS_USE,COMPASS_USE2,COMPASS_USE3parameters to 0VISO_TYPEparameter to 2
1.3. Connect RC and calibrate the Remote Controller
- Connect RC controller receiver to FC
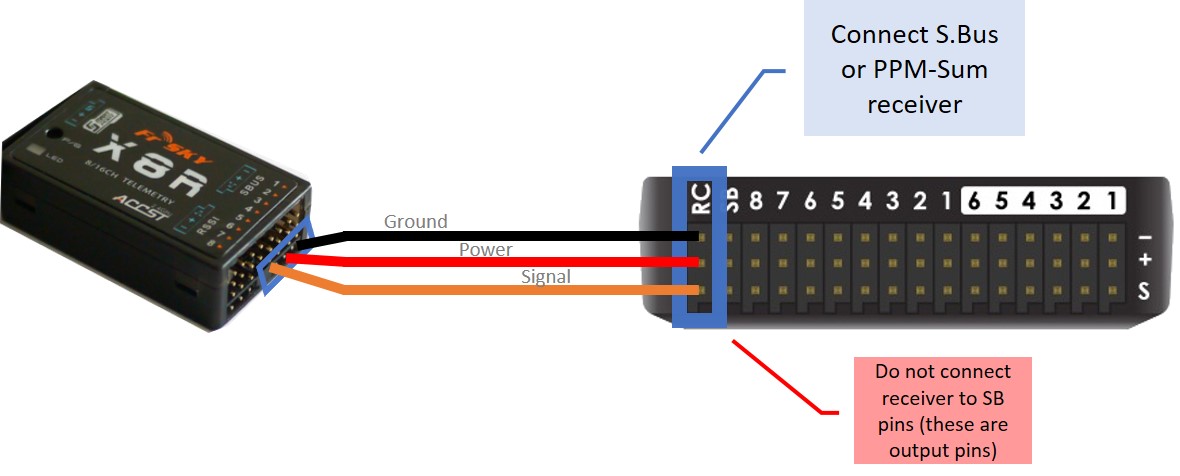
RC receiver with Pixhawk
- Calibrate RC with Ardupilot Mission Planner
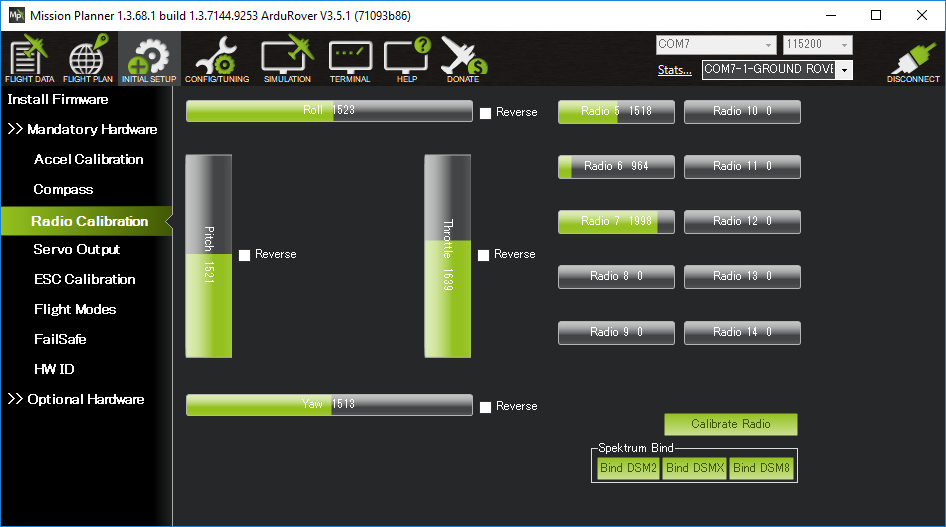
RC Calibration with Mission Planner
2. Connect Ardupilot with UART
- To connect Ardupilot and companion board with uart, use usb-to-tts and connect it to
TEL1on px4 board
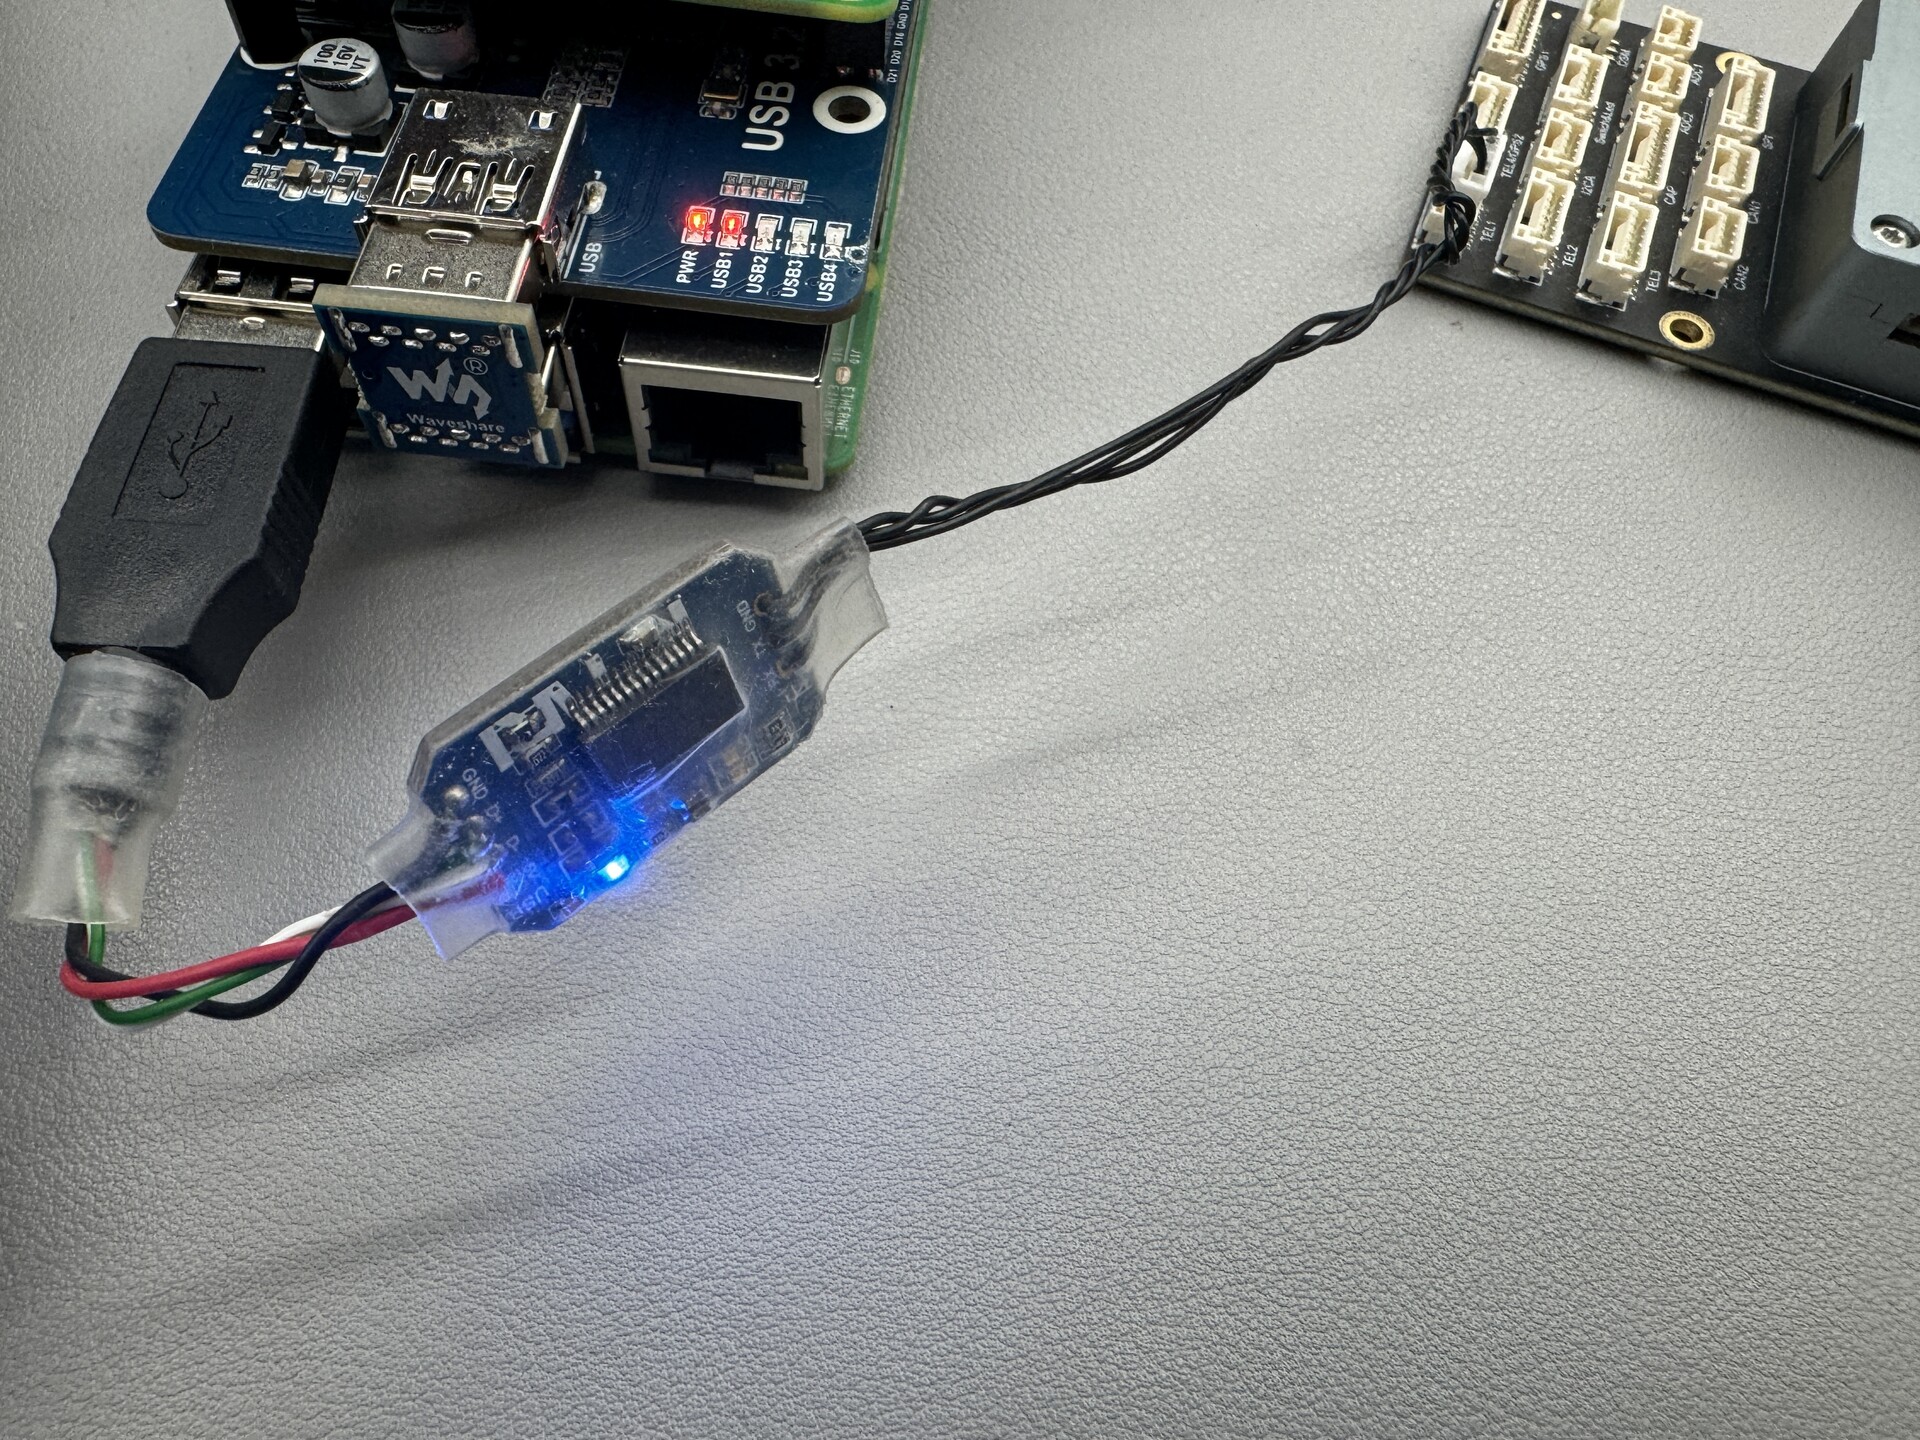
Companion Board and Pixhawk Connection
- Then set the port with QGroundContol
- Setting baud rate as same as the SLAMBOX configuration
- See how to configure SLAMBOX (link)
- NOTE: the SLAMBOX's baud rate and Ardupilot's baud rate should be SAME
- To get data from Ardupilot FC, need to set the parameters of Ardupilot to send data
- Note that the SR1 means the telem1 port of FC
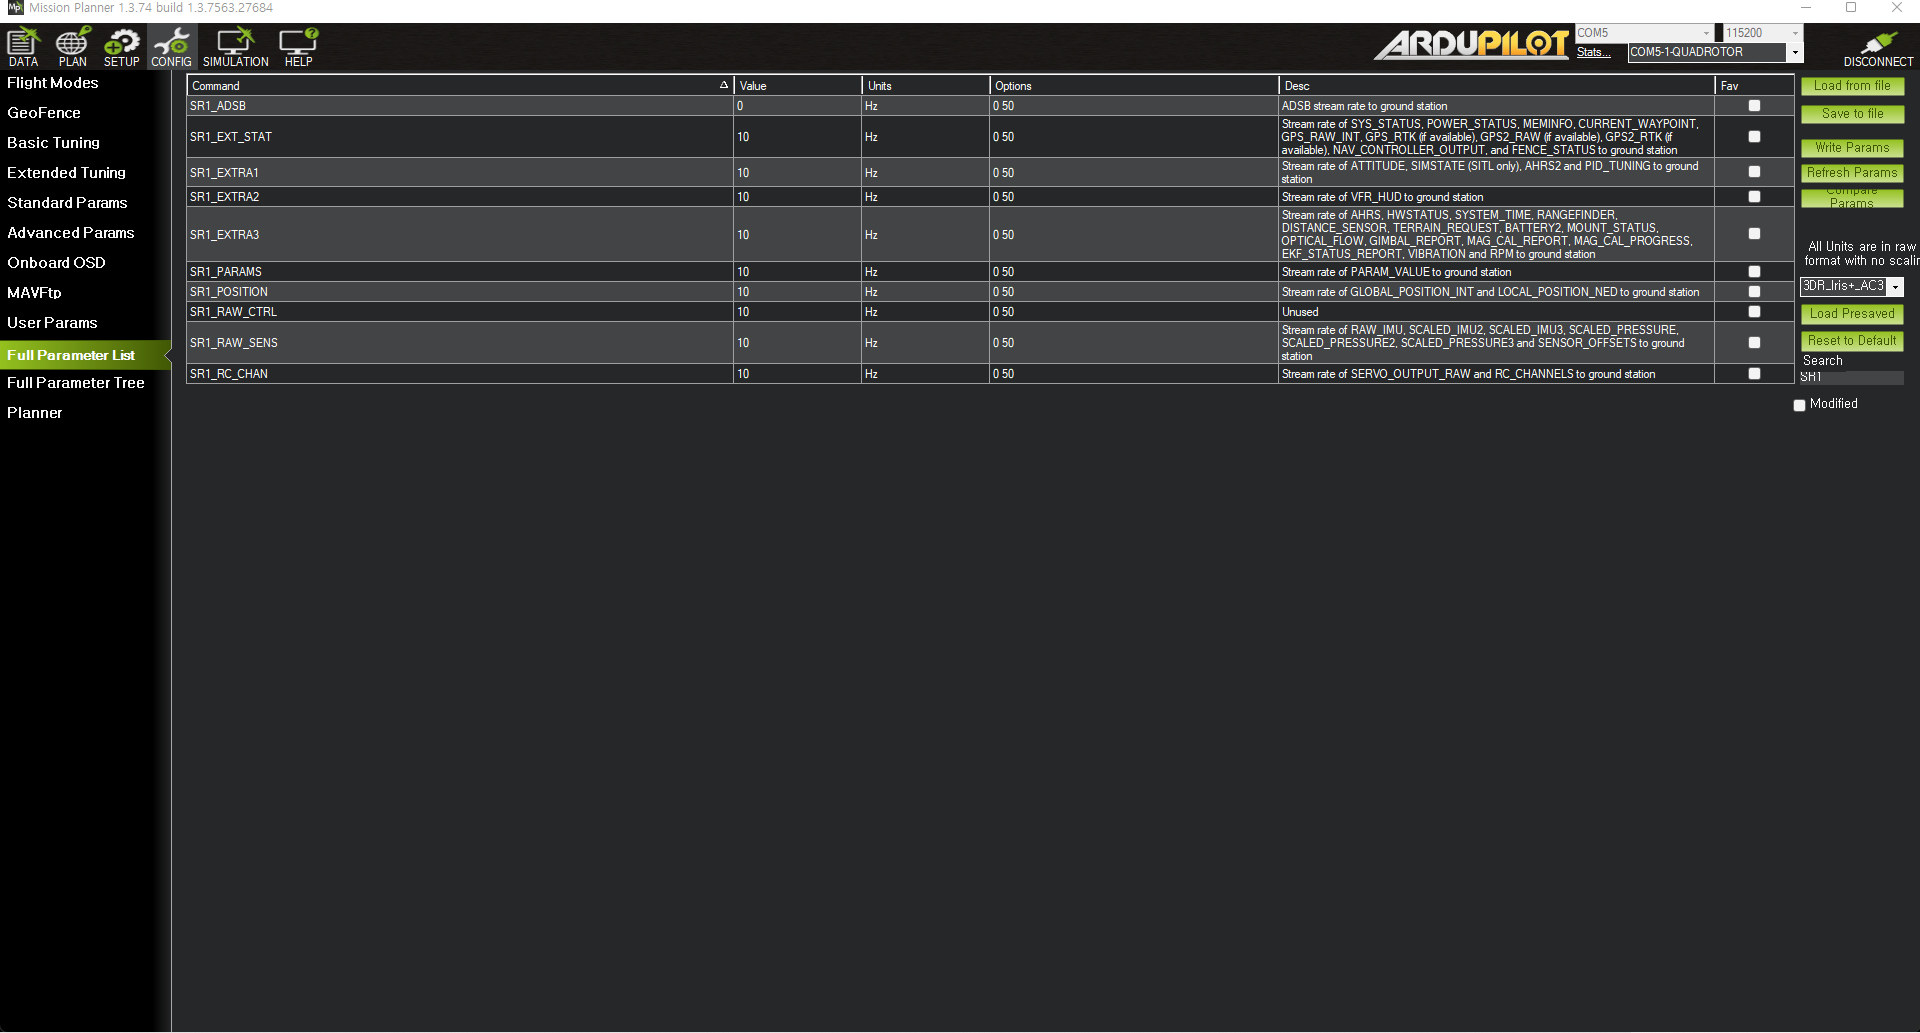
Set Parameters to get data from Ardupilot
3. Update SLAMBOX Setting
- Update SLAMBOX Mavlink setting with command below
- Check the details here
# Enable Mavlink
$MAVLINK_ENABLE 1#
# Change baudrate
$MAVLINK_BAUD 921600#
# Set Mavlink type to px4
$MAVLINK_TYPE 1#