|
|
Version: 0.2.0 |
Table of Contents
Welcome to the LiDAR Setting Manual for SLAMBOX. This guide will walk you through the necessary steps to successfully connect LiDAR with SLAMBOX.
Please follow instructions on your LiDAR sensor.
- Livox MID-360
- Livox AVIA
- Ouster OS0 Family (OS0-32, OS0-64, and OS0-128)
- Unitree L1 Unitree L1
- Velodyne Puck (Lite)
- SOSLab ML-X-120
1. Livox MID-360
1.1. Preparing for LiDAR setup
Before starting the setup process, make sure you have following:
- LiDAR configuration software
- Computer with Ethernet ports (Ubuntu or Windows)
1.2. MID-360 Configuration Steps
1.2.1. Download Livox Viewer 2 for MID-360
Please visit MID-360 downloader center and download Livox Viewer 2 compatible with your operating system.
1.2.2. Conecting MID-360 to the Computer
Connect the MID-360 LiDAR to your computer using the Ethernet cable.
1.2.3. Setting Computer IP Address
Set the computer's IP address according to the MID-360 default setting. The default setting of MID-360 is to set your IP Address to 192.168.1.x. In this tutorial, we will set IP address to 192.168.1.50
Once you setup IP address, you may require to disable and re-enable your ethernet in order to apply the configuration.
1.2.4. Launching LiDAR Viewer Software
Extract Livox Viewer and launch Livox Viewer 2 via LivoxViewer2.sh script. Make sure the LiDAR is detected on Lidar List. Check if LiDAR is working as below screenshot.

1.2.5. Setting LiDAR IP Address
Once the connection is established, click on Settings icon. Modify IP Settings as follow. Lidar IP: 192.168.1.100, Subnet Mask: 255.255.255.0, and Gateway Address: 192.168.1.1
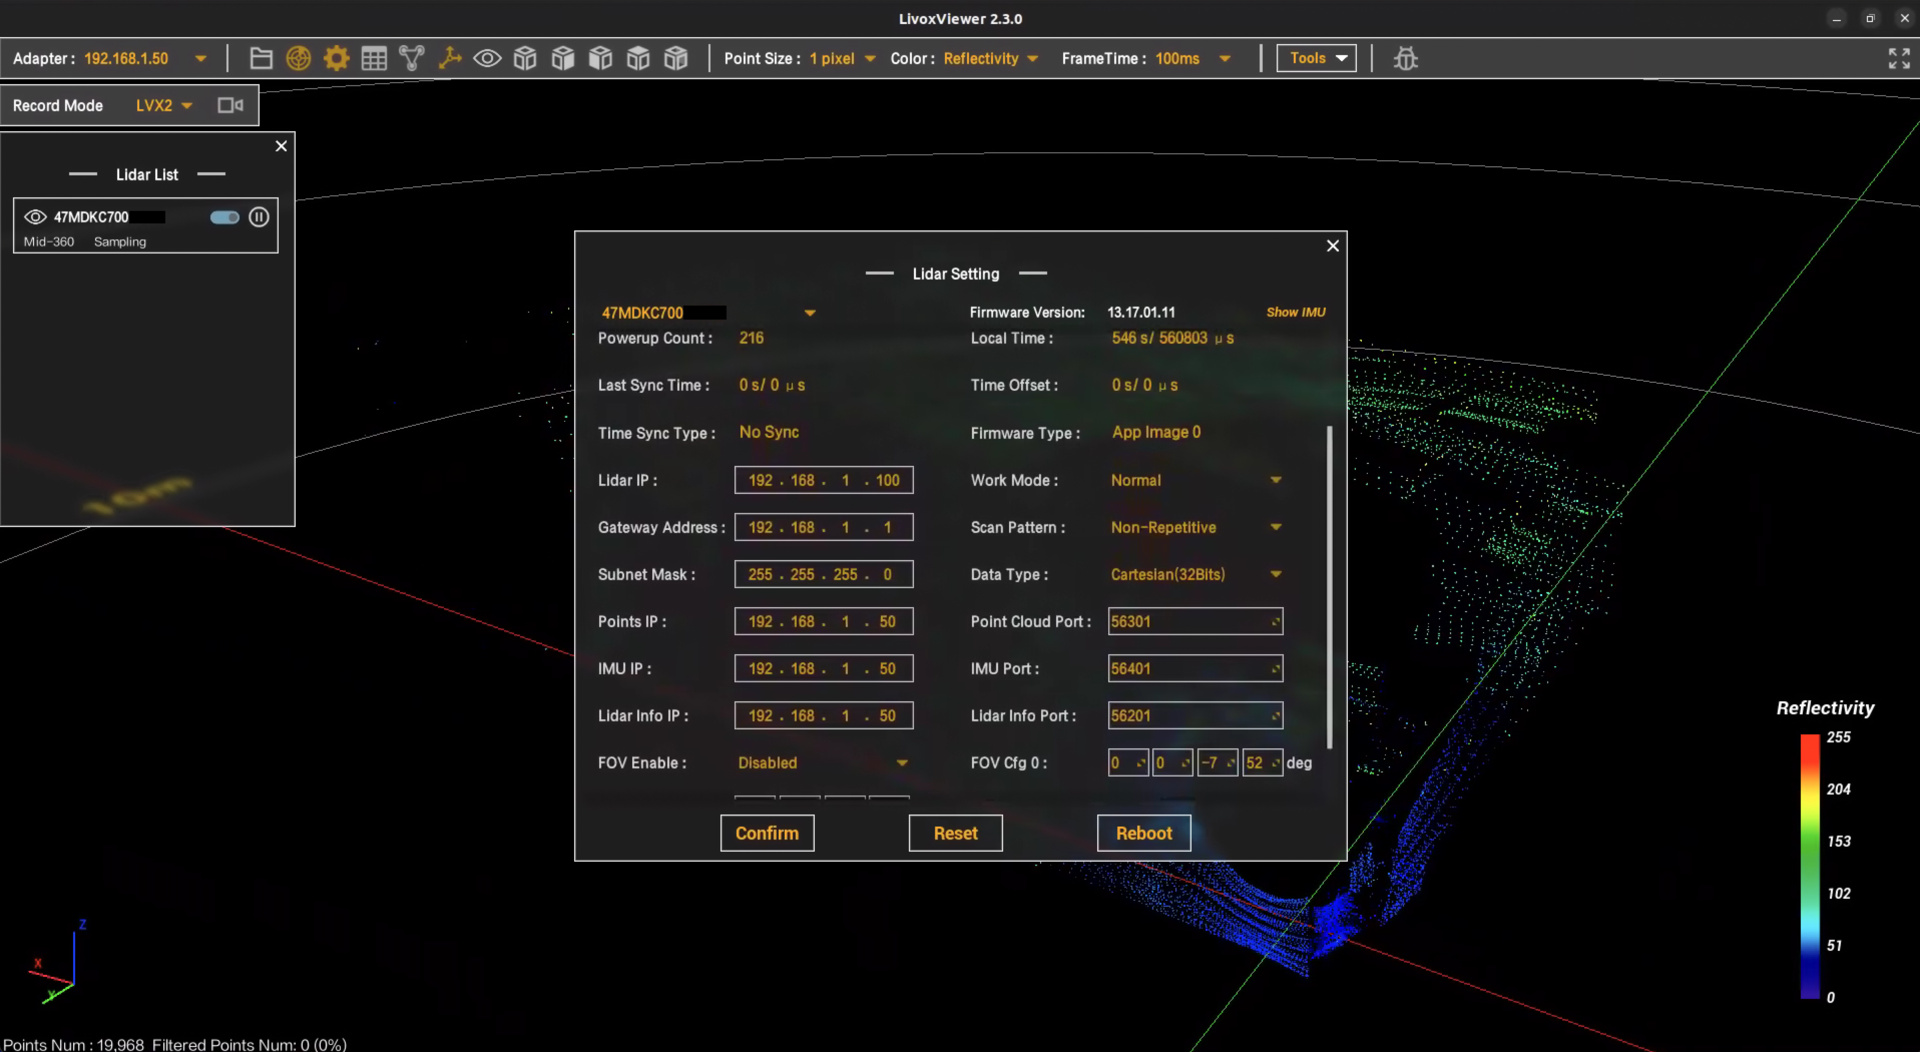
Click on Confirm and REBOOT. Make sure the LiDAR connects after reboot procedure. Now MID-360 is ready to connect with SLAMBOX device. Connect MID-360 to SLAMBOX device via ethernet cable.
2. Livox AVIA
2.1. Preparing for LiDAR setup
Before starting the setup process, make sure you have following:
- LiDAR configuration software
- Computer with Ethernet ports (Ubuntu or Windows)
2.2. AVIA Configuration Steps
2.2.1. Download Livox Viewer for AVIA
Please visit AVIA downloader center and download Livox Viewer compatible with your operating system.
2.2.2. Conecting AVIA to the Computer
Connect the AVIA LiDAR to your computer using the Ethernet cable.
2.2.3. Setting Computer IP Address
Set the computer's IP address according to the AVIA default setting. The default setting of AVIA is to set your IP Address to 192.168.1.x. In this tutorial, we will set IP address to 192.168.1.50
Once you setup IP address, you may require to disable and re-enable your ethernet in order to apply the configuration.
2.2.4. Launching LiDAR Viewer Software
Extract Livox Viewer and launch Livox Viewer via livox_viewer.sh script.
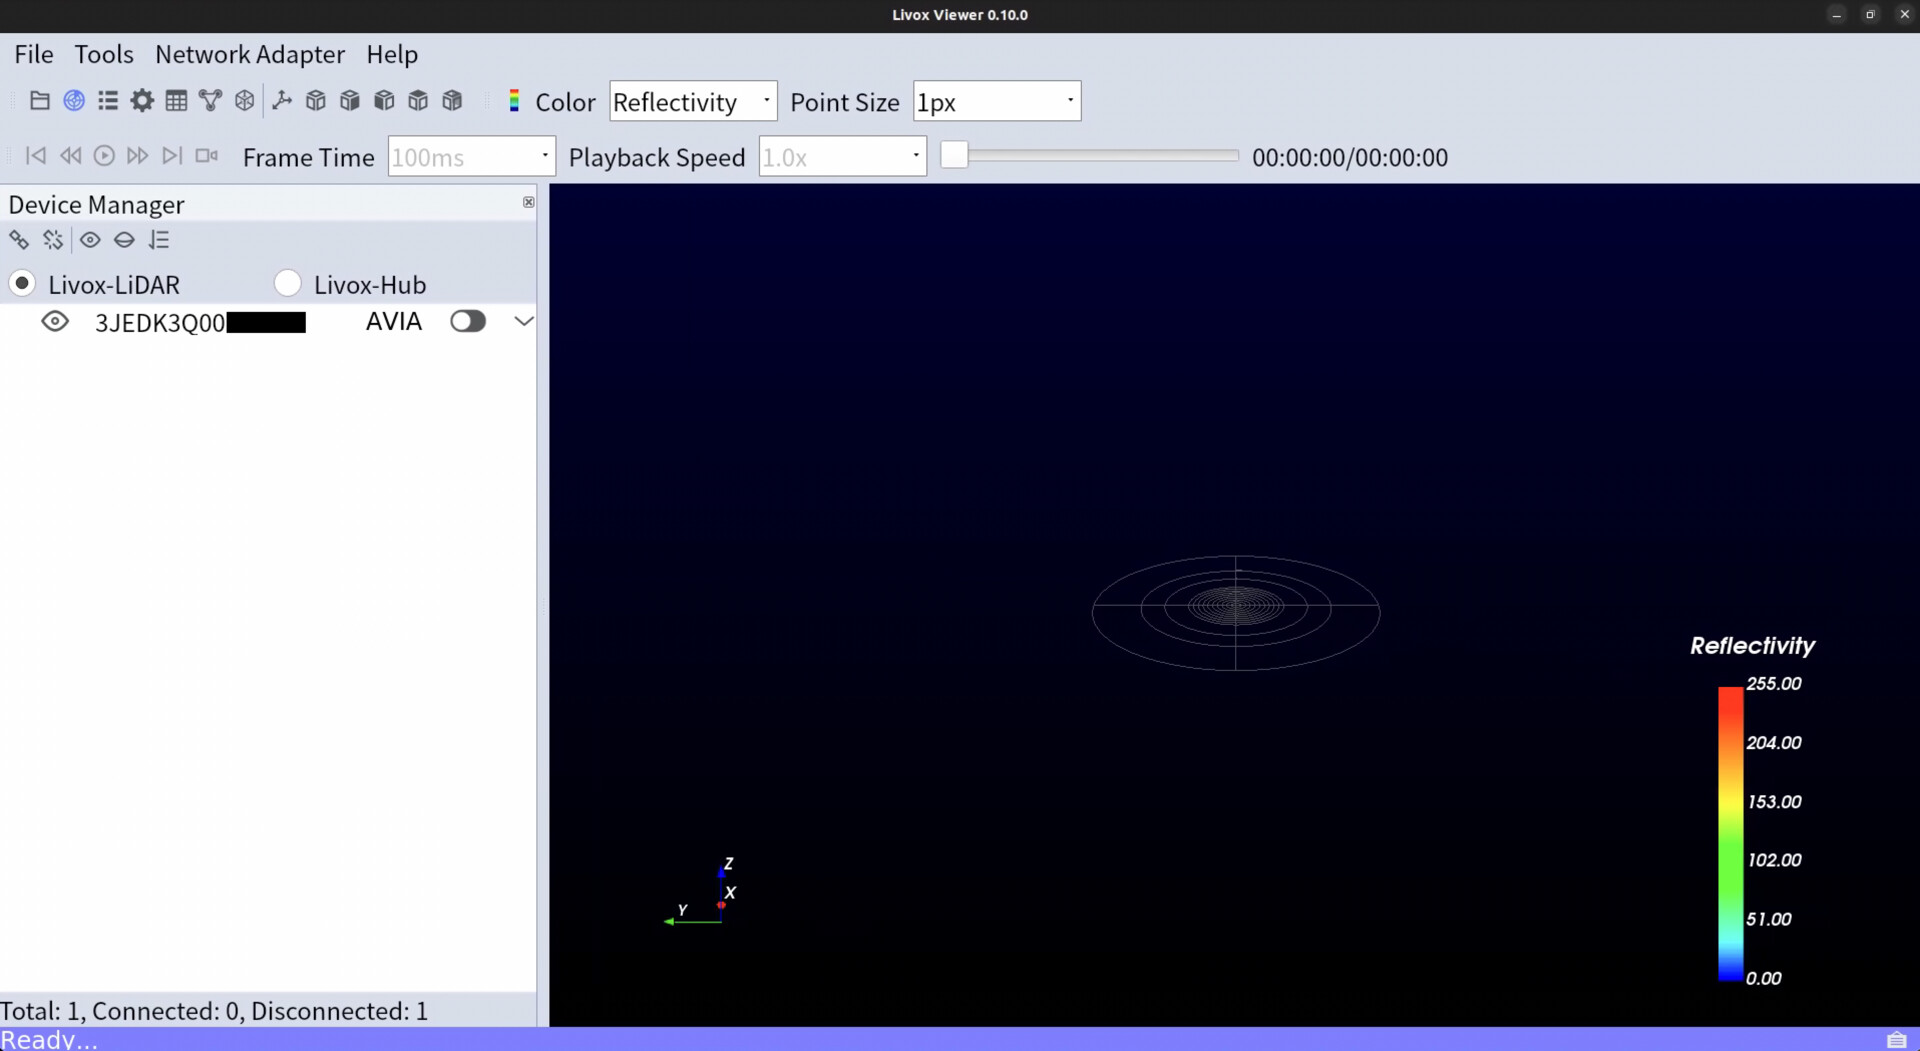
Make sure the LiDAR is detected on Device Manager. Check if LiDAR is working as below screenshot.
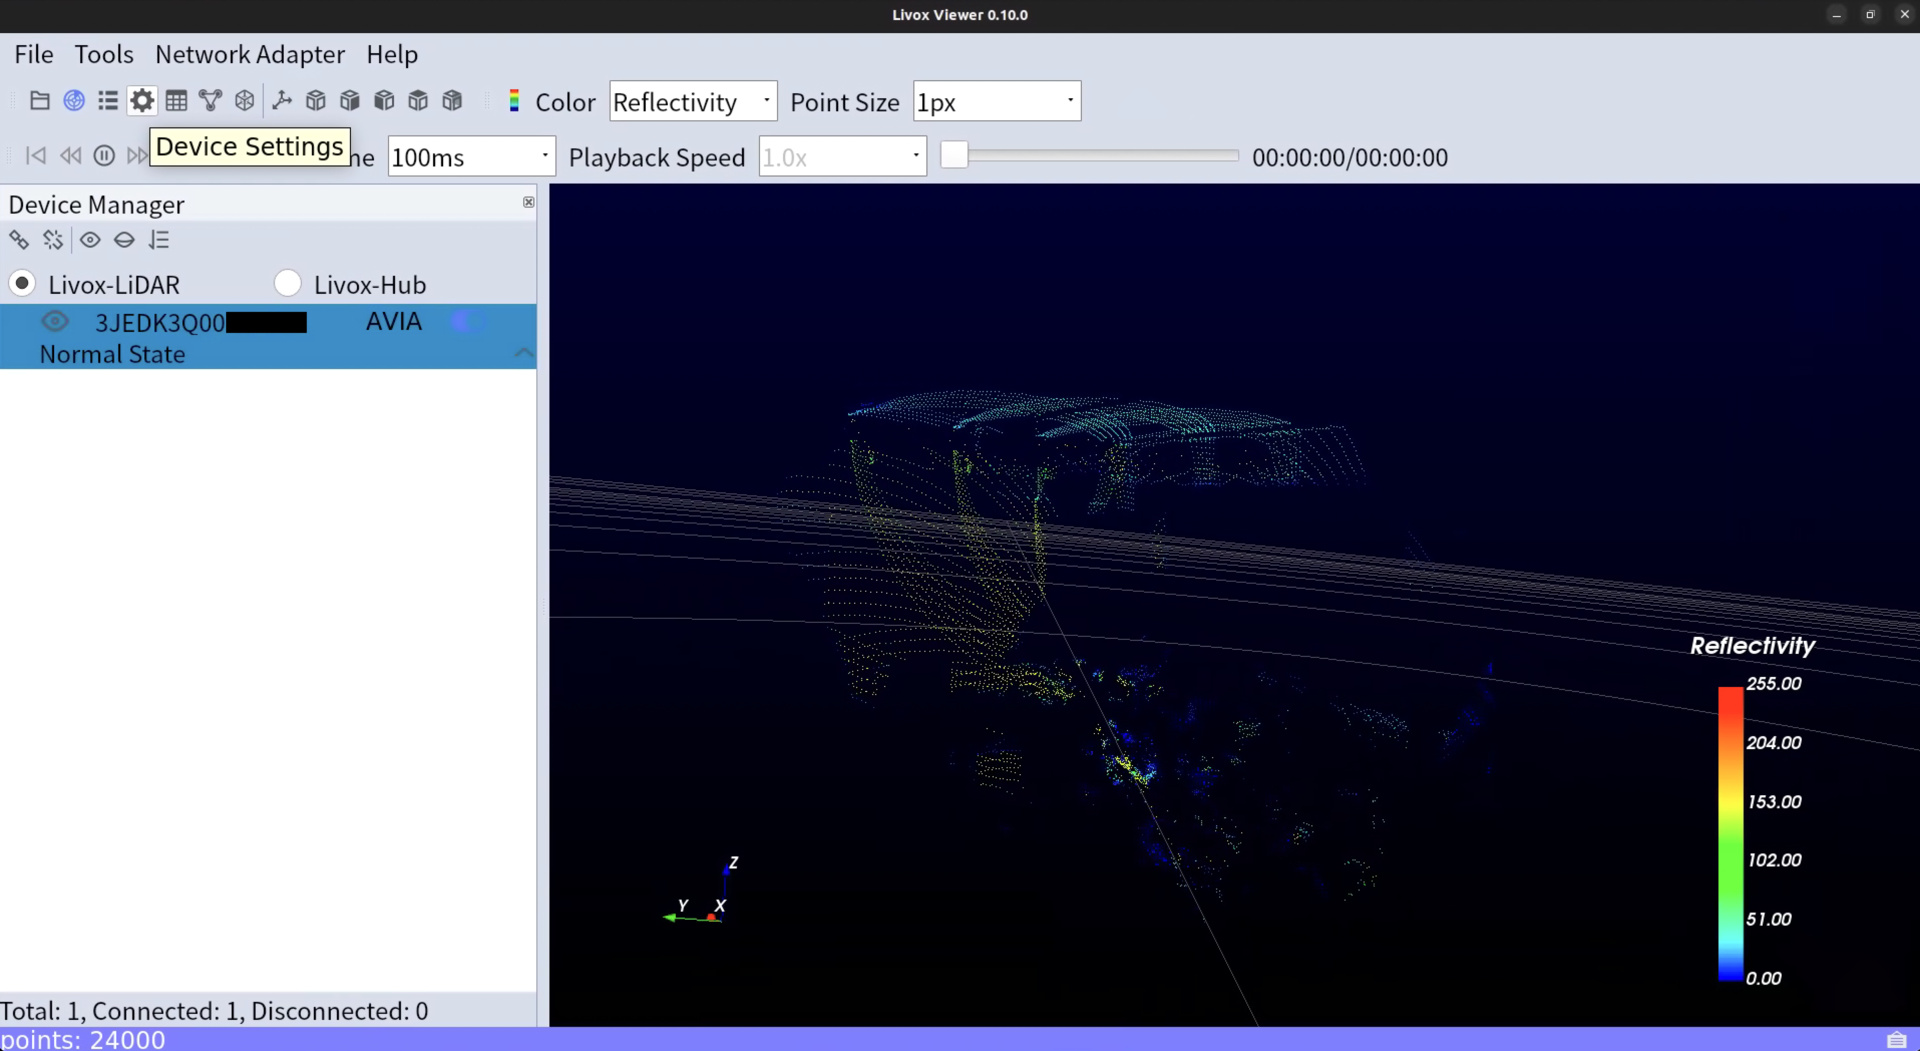
2.2.5. Setting LiDAR IP Address
Once the connection is established, click on Device Settings icon. Modify IP Settings to Static IP and IP Address: 192.168.1.100, Subnet Mask: 255.255.255.0, and Gateway: 192.168.1.1
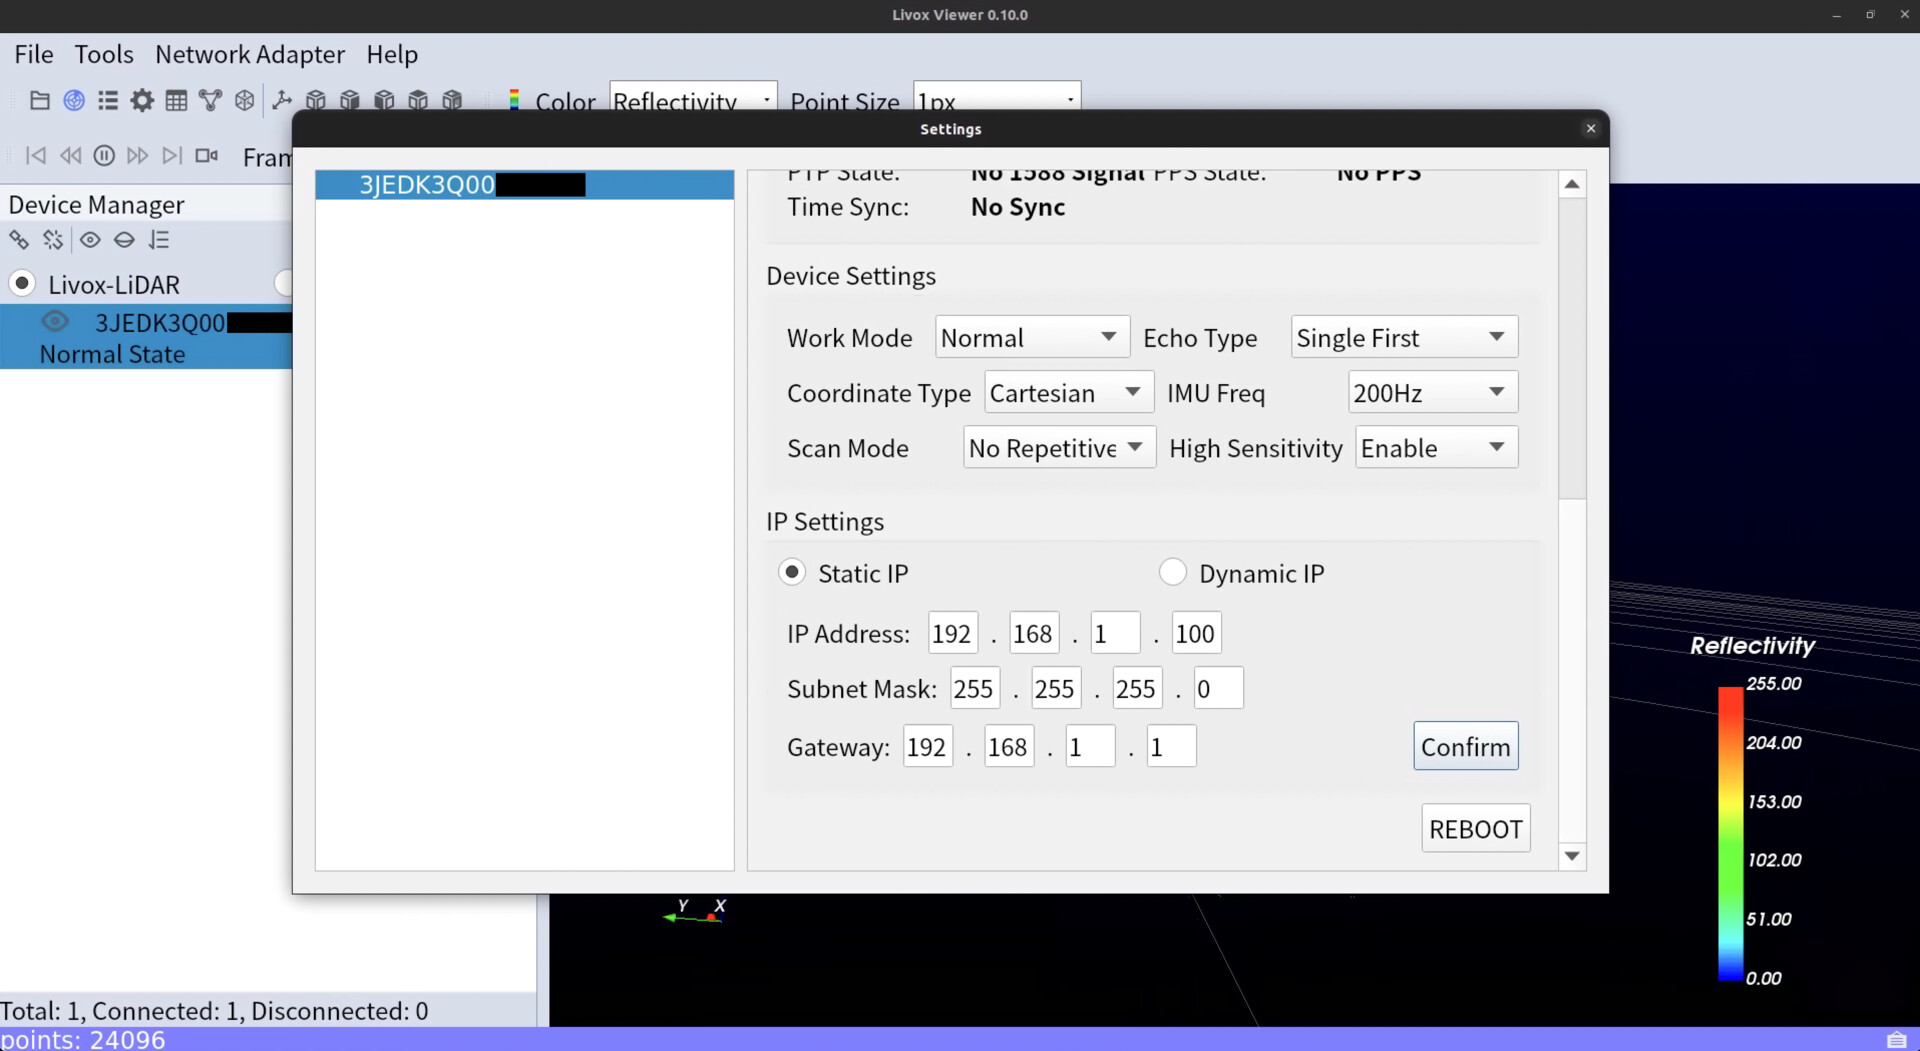
Click on Confirm and REBOOT. Make sure the LiDAR connects after reboot procedure. Now AVIA is ready to connect with SLAMBOX device. Connect AVIA to SLAMBOX device via ethernet cable.
3. Ouster OS0 Family (OS0-32, OS0-64, and OS0-128)
3.1. Preparing for LiDAR setup
Before starting the setup process, make sure you have following:
- LiDAR configuration software
- Computer with Ethernet ports (Ubuntu, MacOS,or Windows)
3.2. OS0 Configuration Steps
3.2.1. Download Ouster Studio
Please visit Ouster Studio and download Ouster Studio compatible with your operating system.
3.2.2. Conecting OS0 to the Computer
Connect the OS0 LiDAR to your computer using the Ethernet cable.
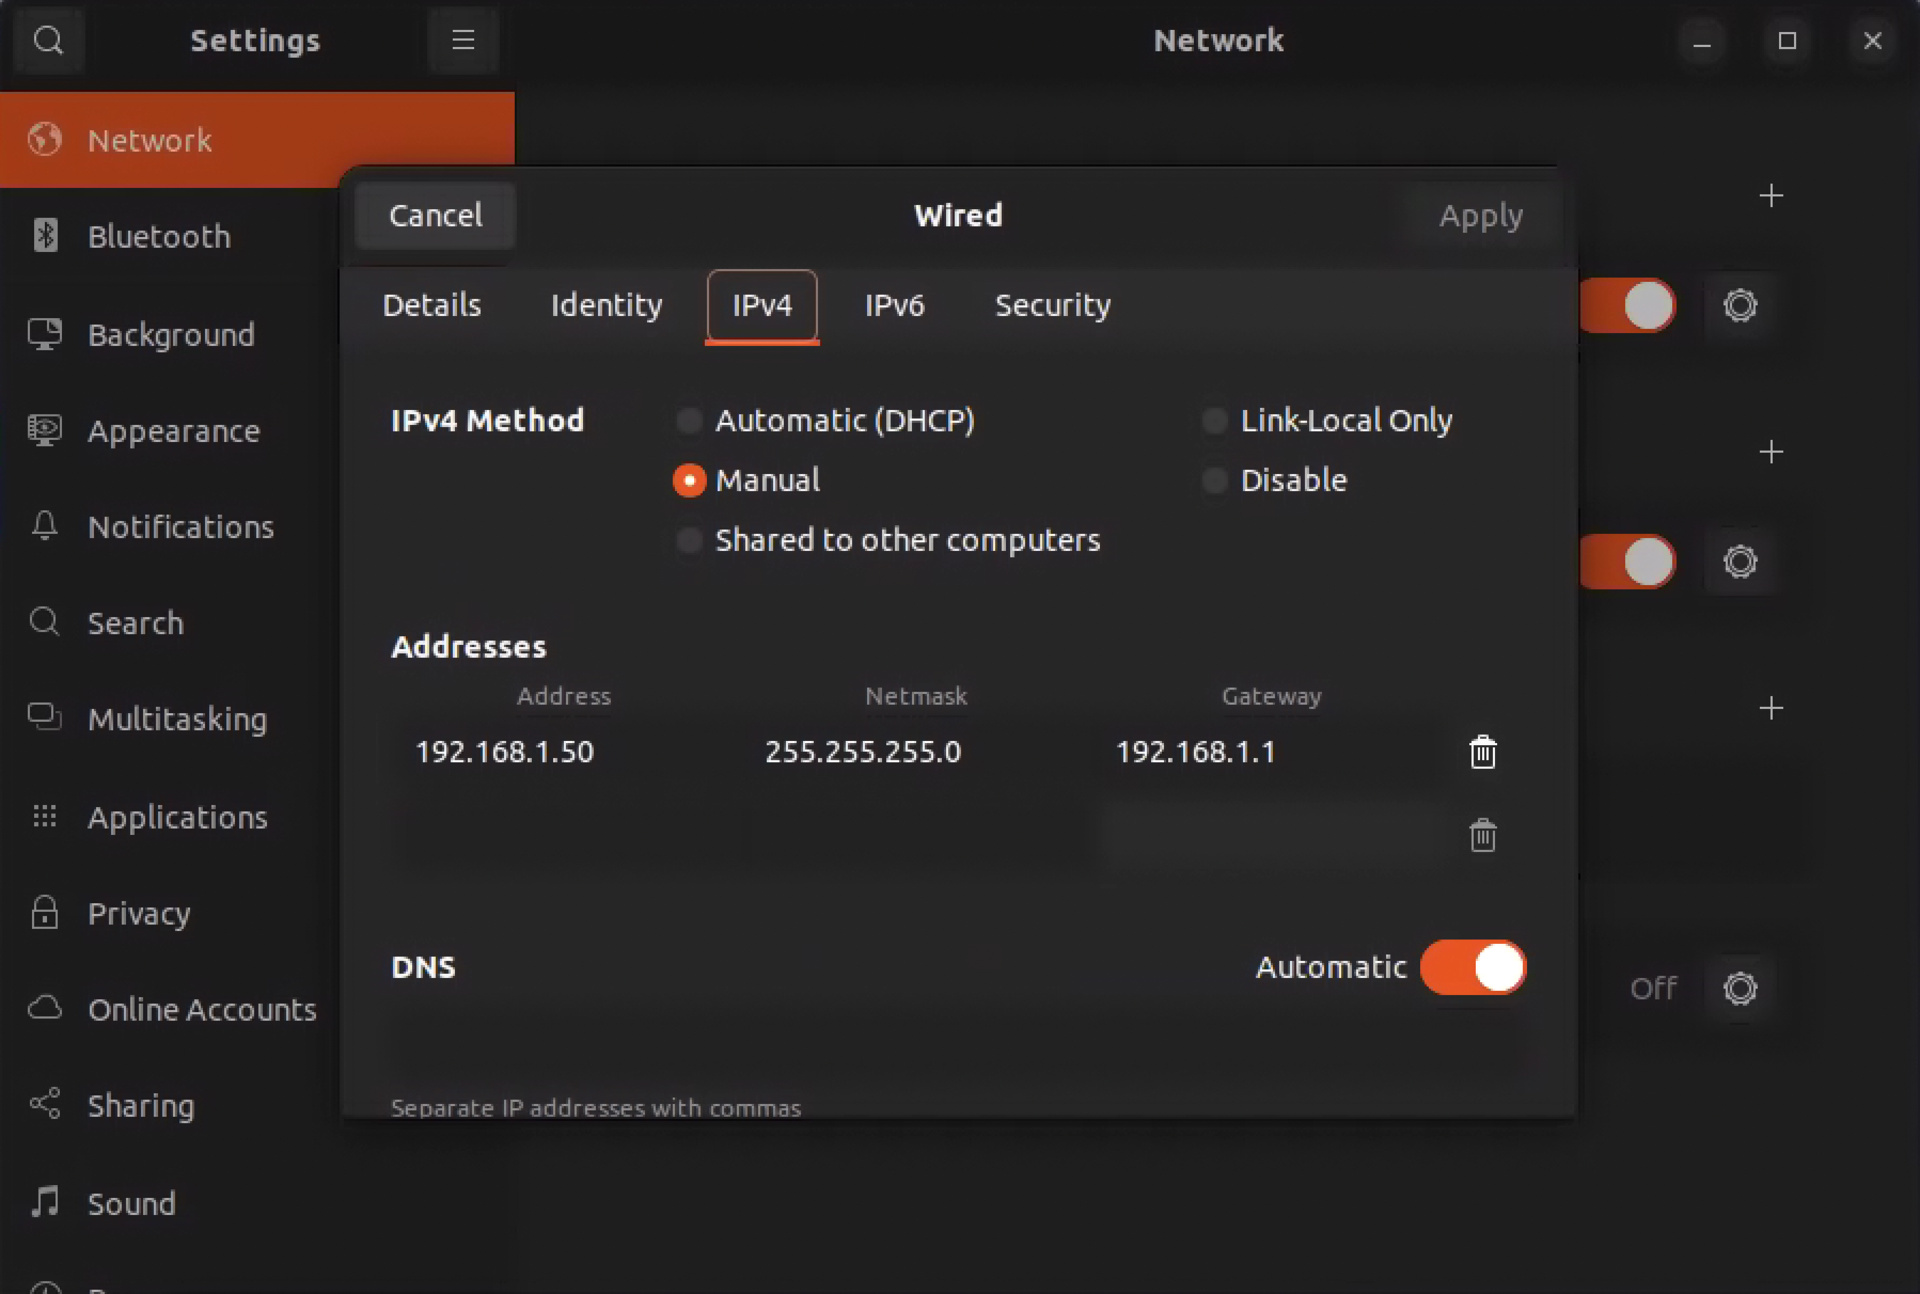
3.2.3. Setting Computer IP Address
Set the computer's IPv4 Method to Link-Local only.
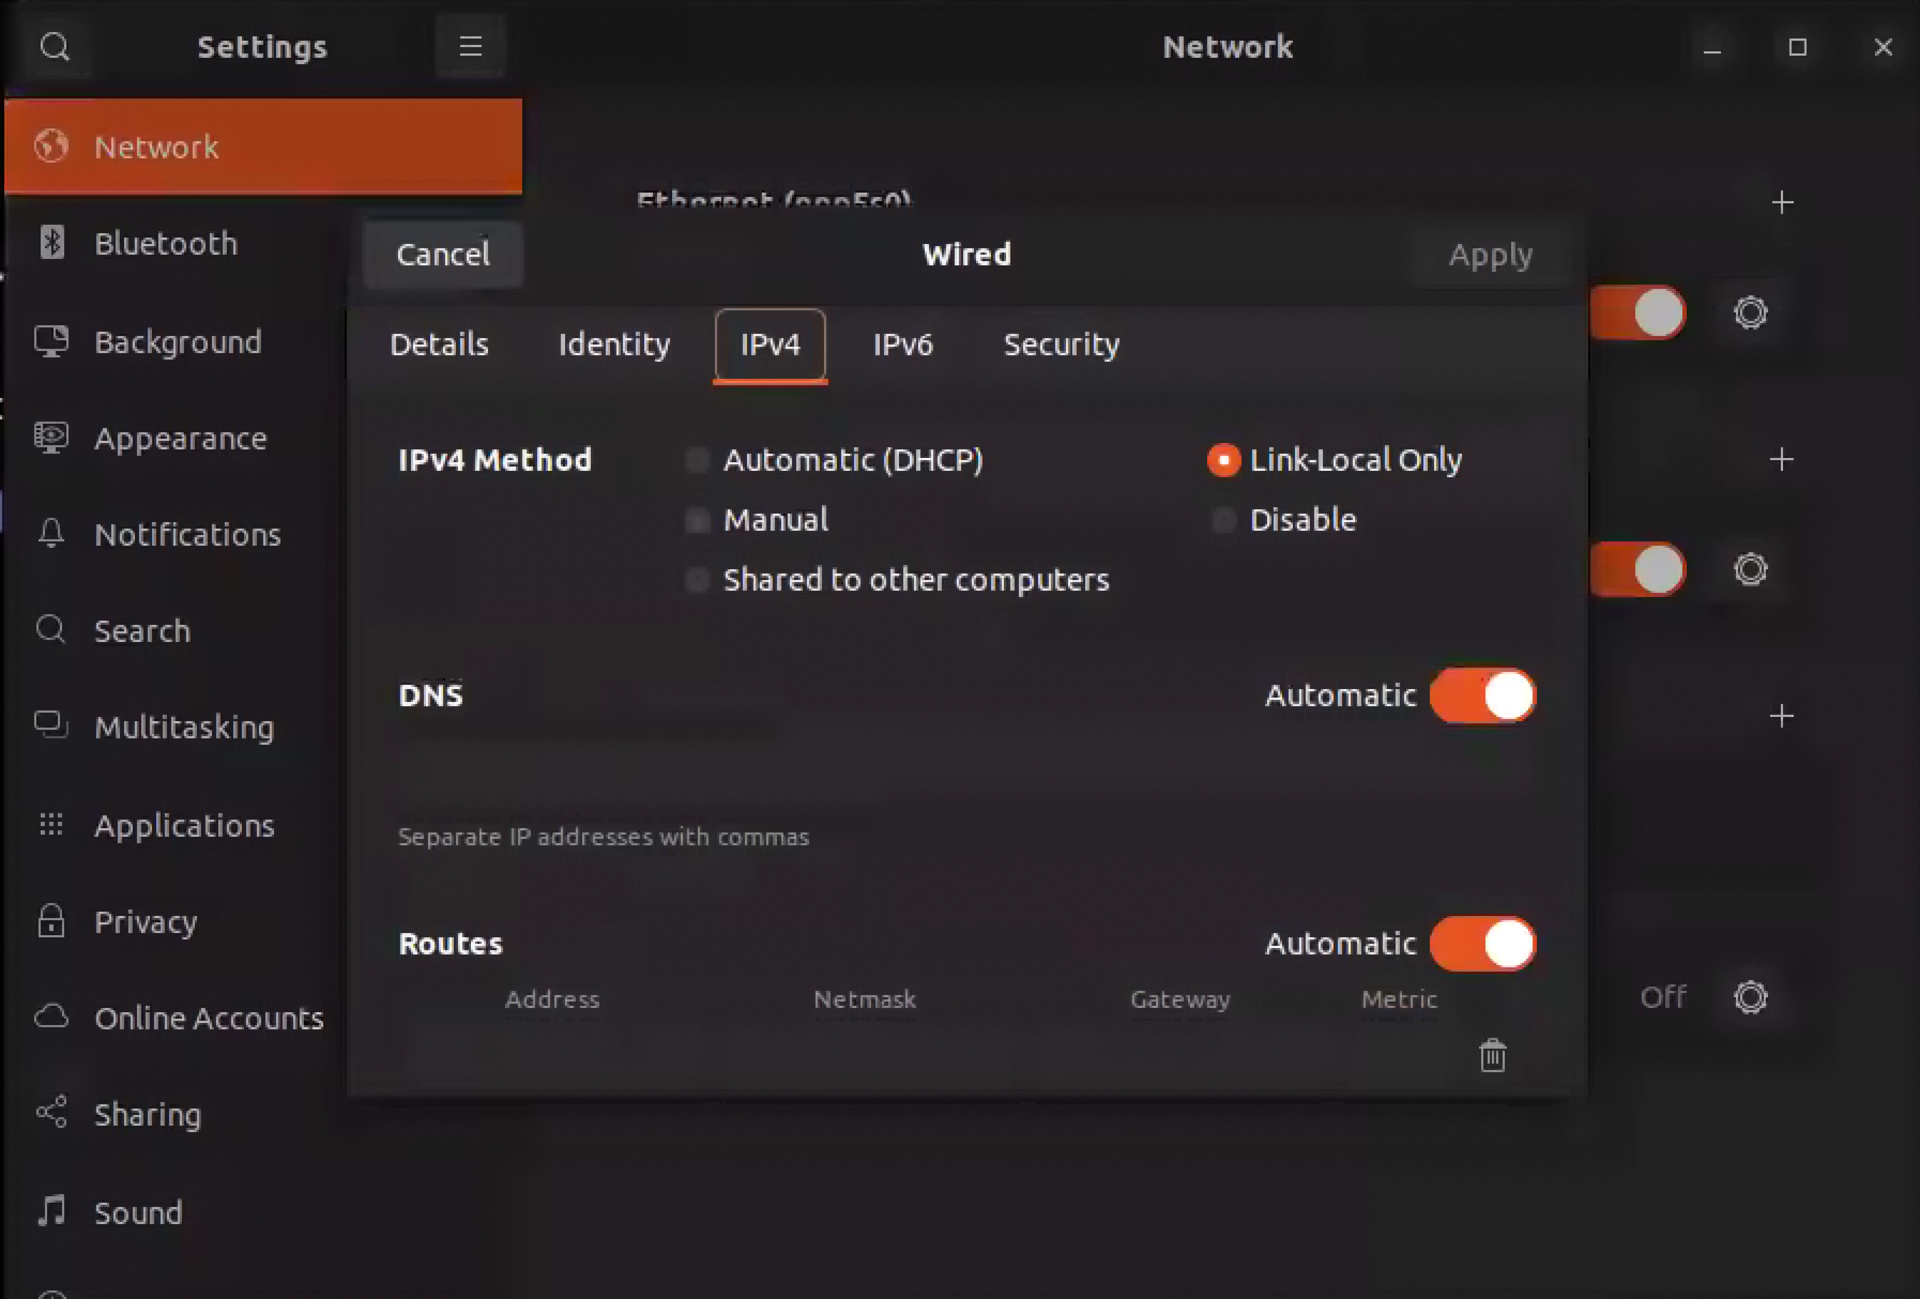
Once you setup IP address, you may require to disable and re-enable your ethernet in order to apply the configuration.
3.2.4. Launching LiDAR Viewer Software
Launch Ouster Studio downloaded from in 3.2.1. Make sure the LiDAR is detected on LIDAR SENSOR FOUND.
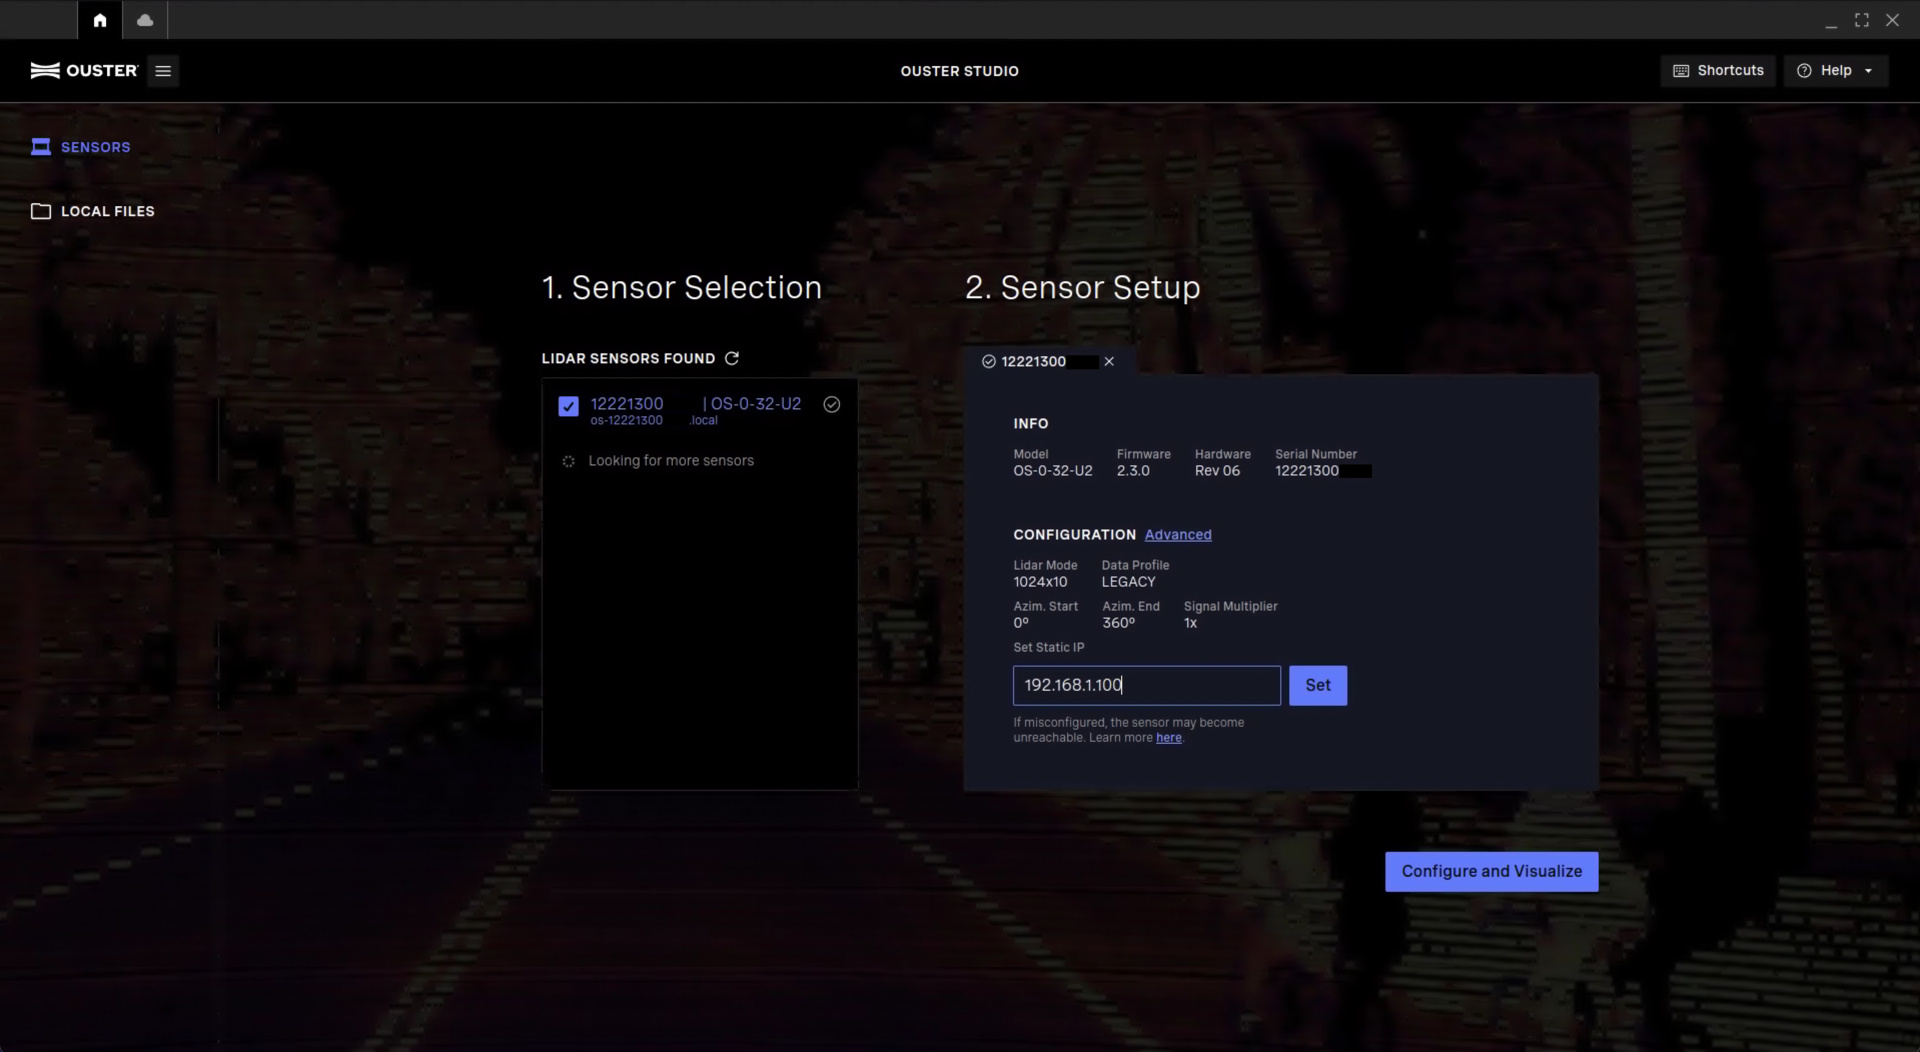
3.2.5. Setting LiDAR IP Address
Once the Lidar is found, enter IP address 192.168.1.100 and click Set.
3.2.6. Check LiDAR connection (Optional)
Set the computer's IP Address to 192.168.1.50
Once you setup IP address, you may require to disable and re-enable your ethernet in order to apply the configuration.
Select detected LiDAR on Ouster Studio and click Configure and visualize. Make sure LiDAR data is visible in Ouster Studio.
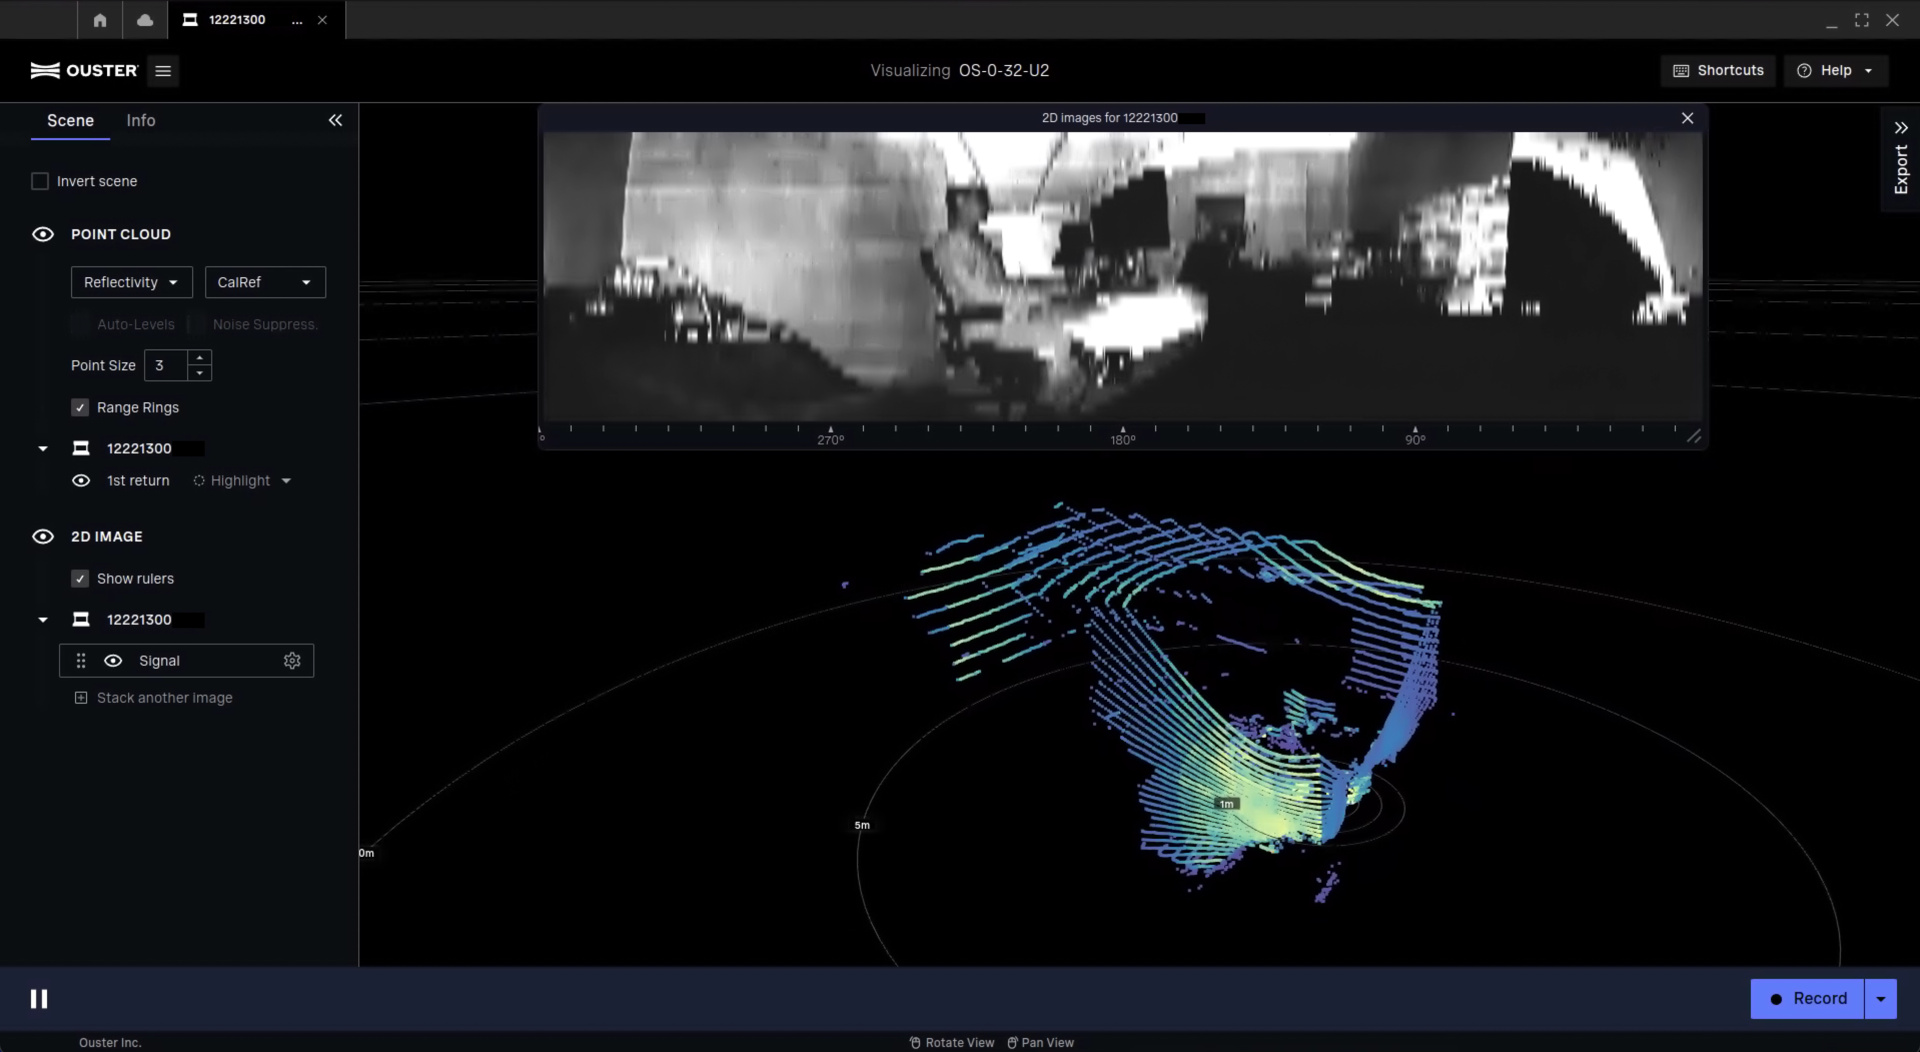
Now OS0 is ready to connect with SLAMBOX device. Connect OS0 SLAMBOX device via ethernet cable.
4. Unitree L1
There is nothing to configure Unitree L1 LiDAR, however, OTG port of the SLAMBOX will be disabled. Please use ethernet port to communicate with SLAMBOX for this case. The documentation of communicating via ethernet cable can be found on here.
5. Velodyne Puck (VLP family)
5.1. Preparing for LiDAR setup
Before starting the setup process, make sure you have following:
- Compudate with Ethernet ports (Ubuntu, MacOS, or Windows)
5.2. Velodyne Configuration Steps
5.2.1. Setting Computer IP Address
Set the computer's IP Address to 192.168.1.50
Then connect to configuration page with any web browser (chrome, firefox etc.)
The default IP of Velodyne Puck is 192.168.1.201
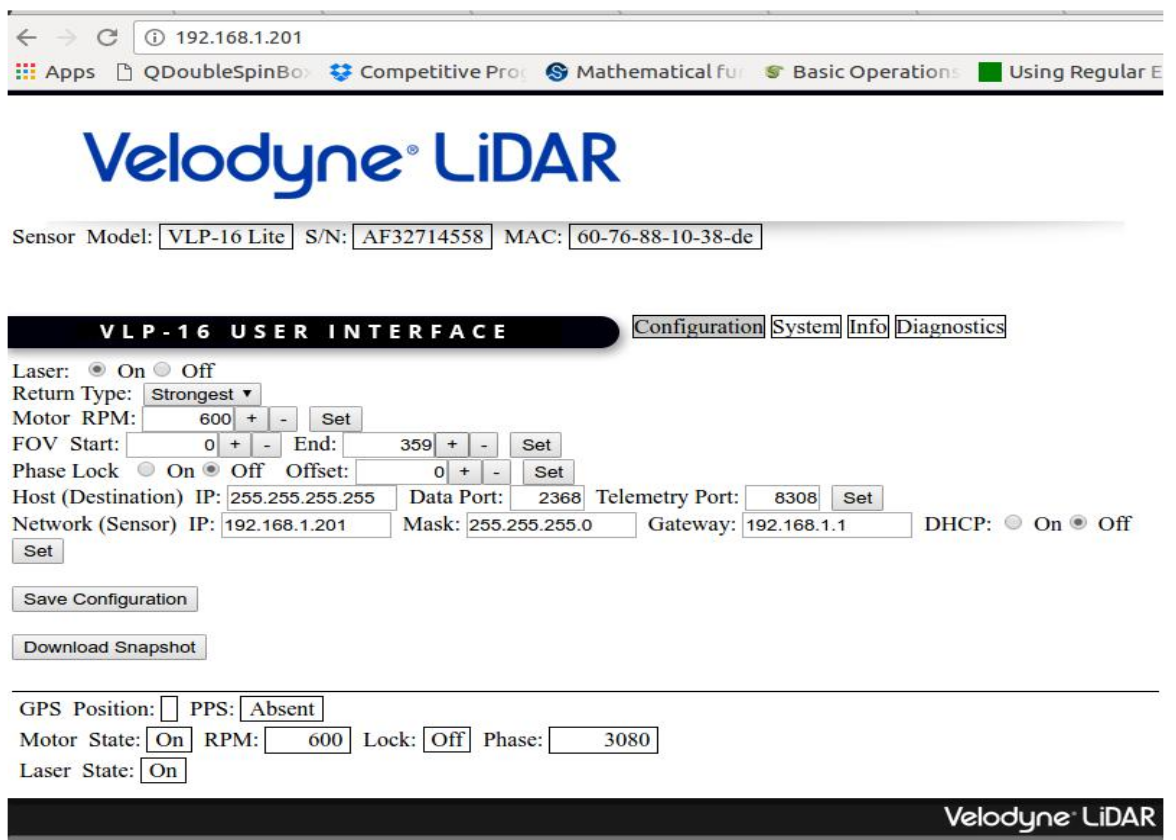
If the configuration pops up without any problems, then connect the LiDAR and SLAMBOX device via ethernet cable.
NOTE Since Velodyne LiDAR does not include an IMU, an internal IMU built in SLAMBOX will be used. Therefore, SLAMBOX is required to align with Velodyne LiDAR as below picture.
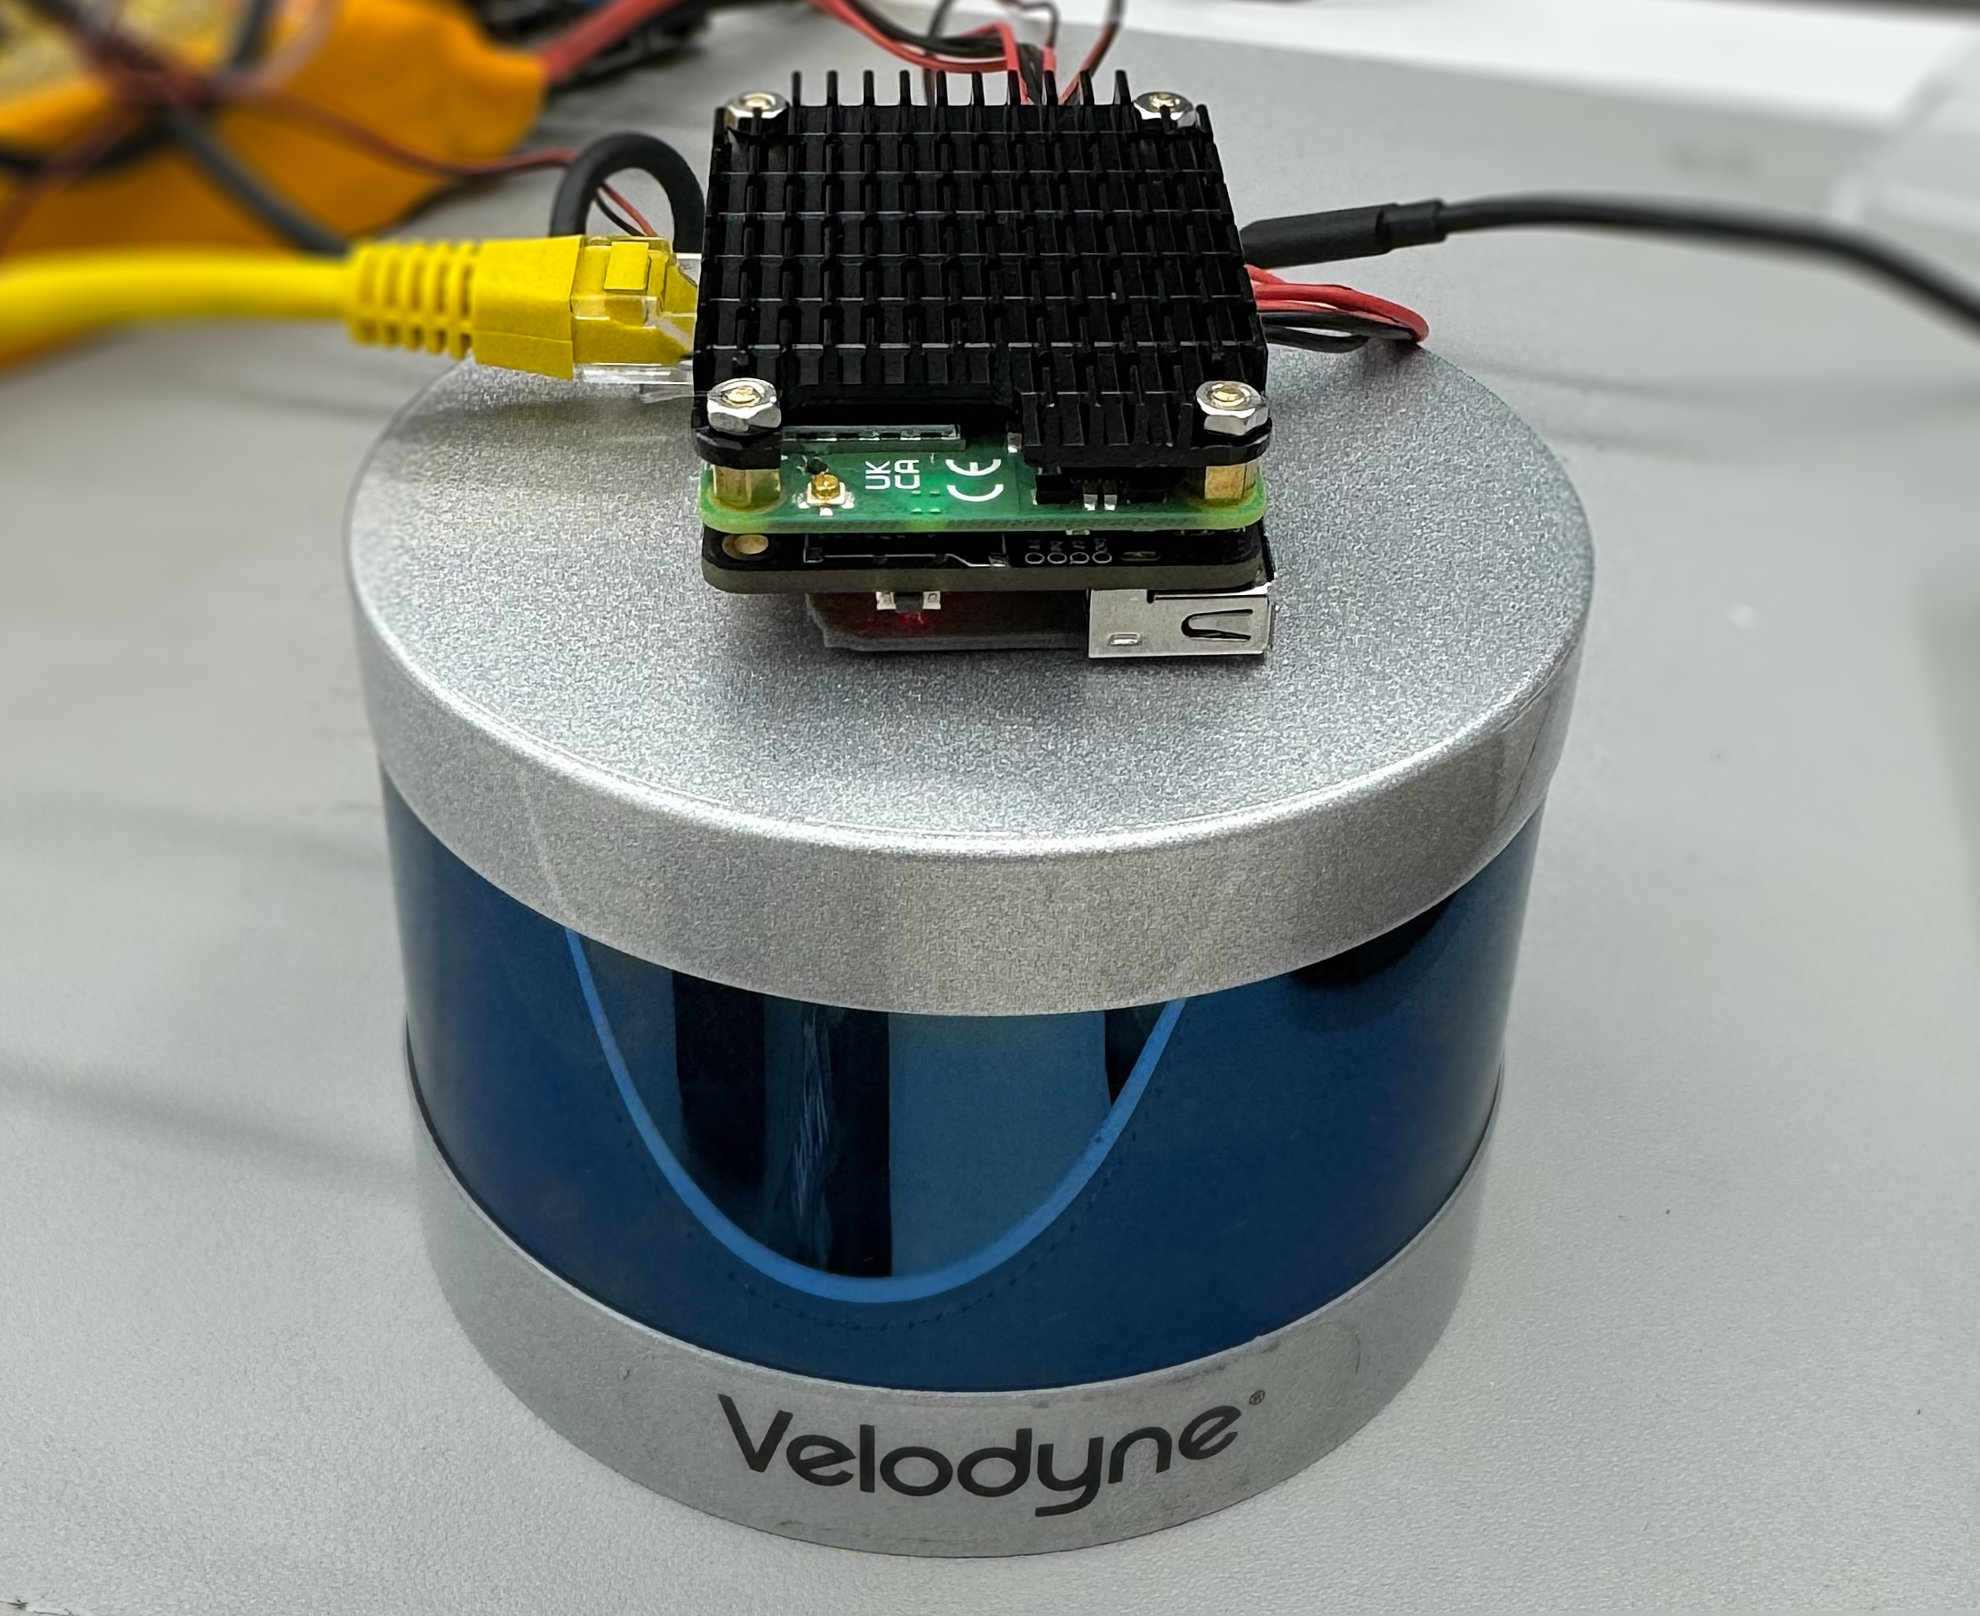
NOTE The coordinate system of Odometry output is based on the LiDAR, however, we advise you to install SLAMBOX as close as possible to the LiDAR for better performance.
6. SOSLab ML-X-120
5.1. Preparing for LiDAR setup
The SOSLab ML-X-120 LiDAR's default IP address is 192.168.1.10. So, you do not need to set the LiDAR device ip.
If you need to set custom IP to LiDAR, please make sure to set the IP address to 192.168.1.x and connect to the SLAMBOX device via ethernet cable.